
Mytemp mail Temporary email
With no doubt about, there are untrusted websites online that put at risk our security and privacy rights, since in many cases this services are designed to access personal information and later use it to send SPAM. A clear example of this is when we give our personal email address to an online service or subscription to access, without knowing that this data is later stored and used in data bases for different purposes.
Therefore, the less we give access to our personal email and other information online the better. But then, what are we doing to do if we need an email address to enter an online platform or sign up? Actually the answer is quite simple; we will be using a temporary email account, and the perfect platform for this is Mytemp mail, with plenty of functions and advantages respecting this scenario.
In details, the Mytemp mail is a platform that allows us to have a temporary and disposable email account, in order to receive messages related to different online subscriptions and services that require this information, but giving out actual personal email account is not convenient. Also, this type of platform also protects out privacy online and help us to stay safe and deal with SPAM in a much better way.
Having a temporary email using Mytemp.mail
Starting using Mytemp mail is very easy. Just open a new tab on your favorite browser, which could be Chrome, Edge, and Mozilla, Opera or any other that you like and enter the URL address https://mytemp.email/, and automatically the platform will load showing the home screen from where we will be able to start.
If we click on “Start Here” the platform will give us our personal email account to use. However, right below this button there is valuable information to check, telling us how to use the service, purposes, features and more, since in many cases users do not have quite clear the intention of a platform of this sort.
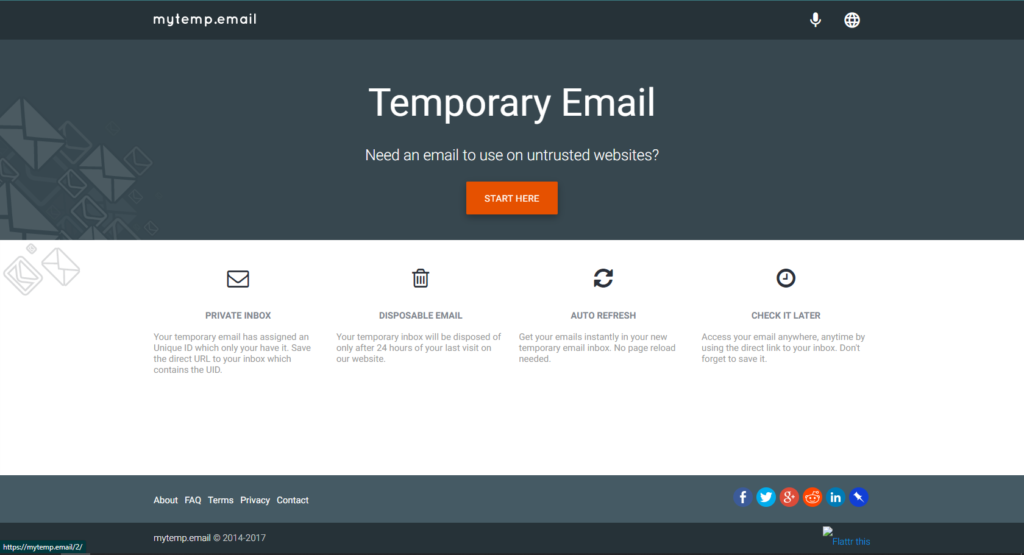
After we have this information clear, there is nothing left but clicking on “Start Here” and begin using the service properly, with and account that the system provides automatically, which is perfect for those who are in a hurry and are not interested on using customizable options or similar, as we are going to show you next.
Enjoy a complete email service with Mytemp mail
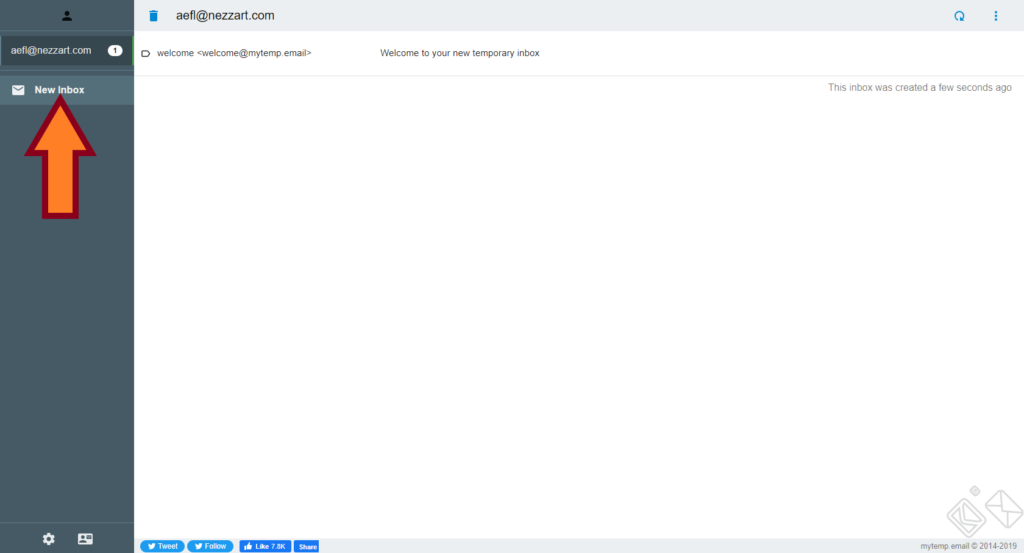
Now that we have entered Mytemp mail has generated an account for us and shows the home page, which include inbox, message content and more, all at once with the purpose of providing the tools in the same place for quick use. For starters, to the left there is the account panel where different information is shown.
On this left panel is shown the account that the platform generated for you, as the one that you will share in order to start receiving messages. In this case the account is aefl@nezzart.com

Mytemp mail is the only platform of its type that allows the user to add other account and use it while others are also active. To do so, click in the option “New Inbox” and another account will be generated automatically, in case of requiring more than one disposable emails.
Right away, the new account will be included in the left panel and you can switch between the other accounts for best conveniences. In this way the corresponding inbox for every account also change and shows incoming messages.
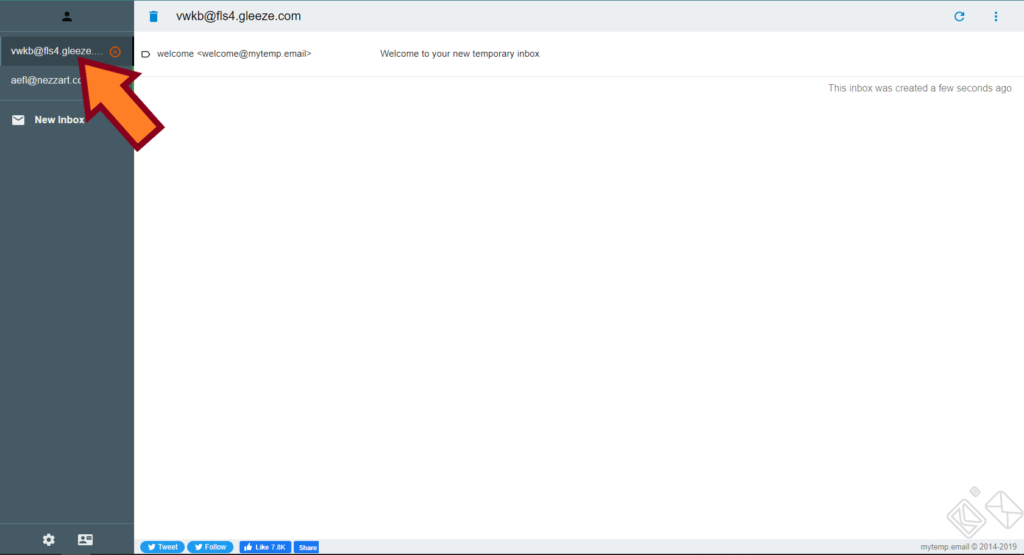
At the bottom of the left panel there is the “Settings” button that show you different options respecting the platform, such as use custom domains, opening link automatically, as well as notification options in case you are using desktop and mobile devices. To come back to inbox on any of the accounts we just have to click on it.

Using inbox and sending emails with Mytemp mail
On another part, the right panel of the platform is the one in which messages are shown in form of a list or inbox, and these emails include sender and subject. The user must know that messages that appear correspond to the selected account on the left panel.
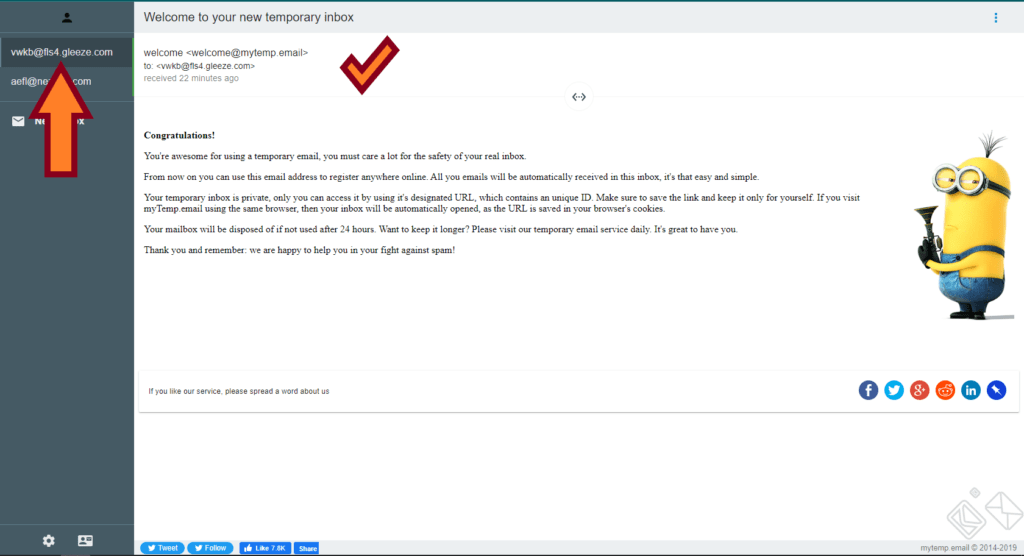
If we click on a message the inbox is substituted with the content of such email, displaying the text and other details like sender, time of arrival, subject and more. When we have a message open there is a button with a two-arrow icon at the center, and this one changes between received messages directly without getting back to inbox. To return to message list click on the account at the left panel.
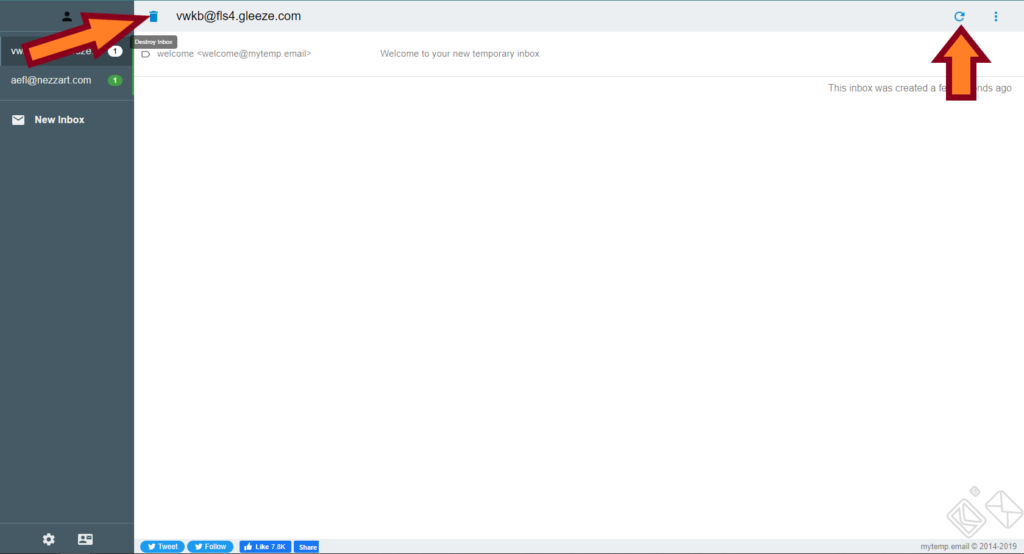
On the other hand, as you can see at the top of the inbox there is another option panel with different functions to perform. To begin with, there are basic possibilities such as “Destroy Inbox Mytemp mail” by clicking in the button with the dumpster icon, and to the right there is the “Refresh” button to reload the page and see if new incoming messages have been received.
Also, if we click on the account present in this option panel it will be automatically copied to clipboard, making it a low simpler to share with friends and with online platforms to receive confirmation messages and access codes.
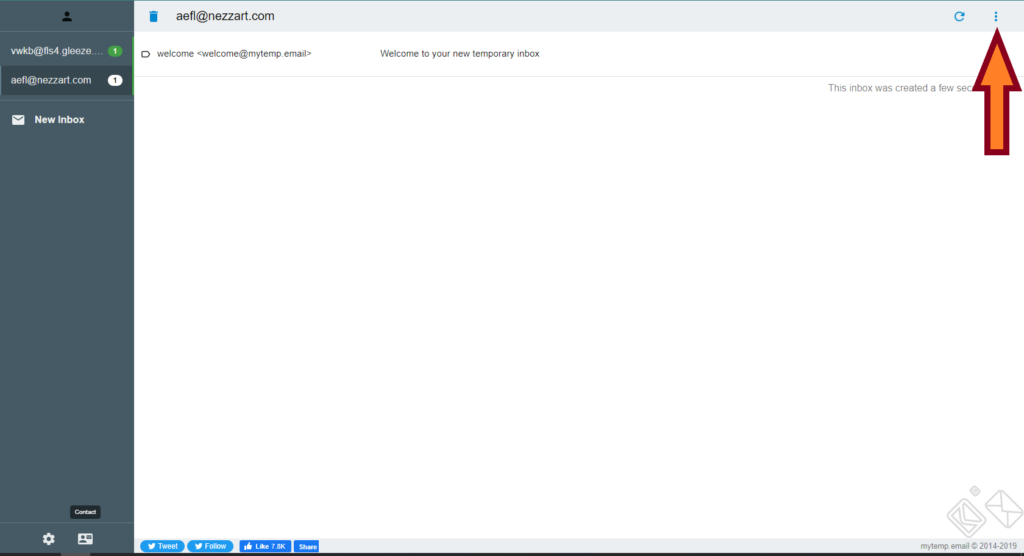
Now, there is a button placed at the very left of the Mytemp mail option panel above the inbox with a three-dot icon, and if we click on it other functions will be shown, although the most important one is the first one or “Write a New Email”.
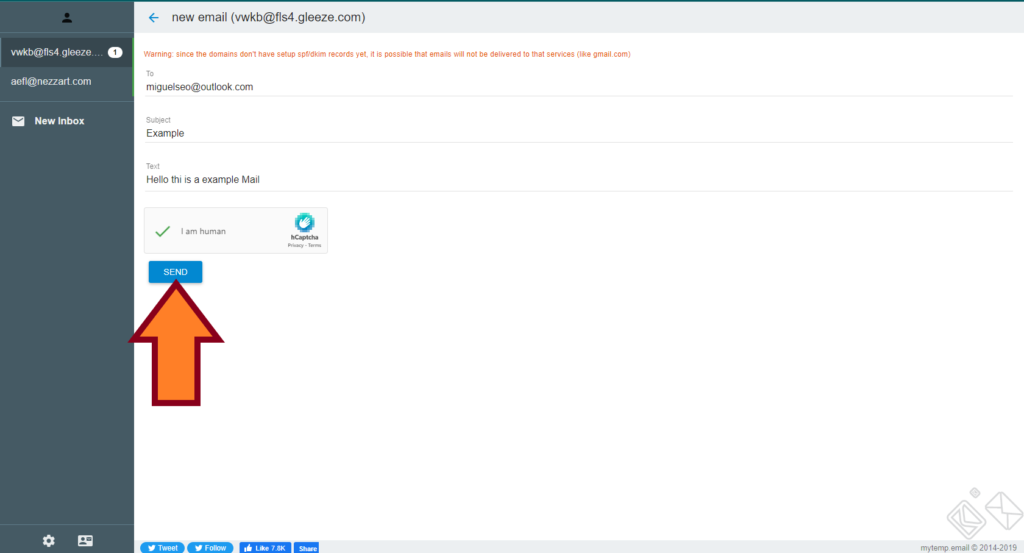
By doing so, a writing panel will open where we will be able to send messages, including recipeitns on the “To:” space, with subject and the text or content in the “Text” space. After the message is written click on “Send” and the email will be delivered to the recipients included.
Like this, Mytemp mail as temporary email platforms becomes one of the most complete online, since it allows to receive and send mails while others just allow to receive, acting as simple containers.
1 Comment
Related posts