
Outlook mail how to send emails, photos, videos and files
Emails are of the most important tools we use on the internet these days, being a formal and informal way to communicate with people from all matters of our lives; from family and people we care to colleagues, work partners and even to stay in contact with our bosses and superiors, emails are imperative to stay in touch, send and receive any kind of relevant information.
Today you will learn how to send an email and how you can attach any type of file to such email you are creating, like this you can share multimedia files with your contacts using outlook by following easy steps.
Sending an email in Outlook
In order to send an email on Outlook the first thing you must do is to log in into the service, and you can do that by writing the URL www.loging.live.com on the address bar in your favorite browser. When you do so, the platform will ask you to enter two credentials; your email address and your password, if both are correct you will be logged in and good to go.
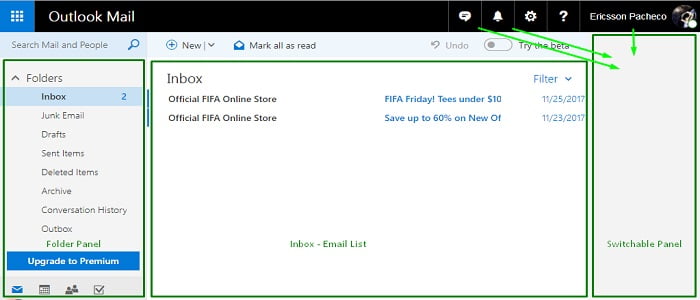
Being on your inbox you will be able to see your new messages on the center, along with the folder panel on the left and an empty space on the right, which works as a switchable panel from where you can open Skype, manage and see new notifications and control your account and profile.
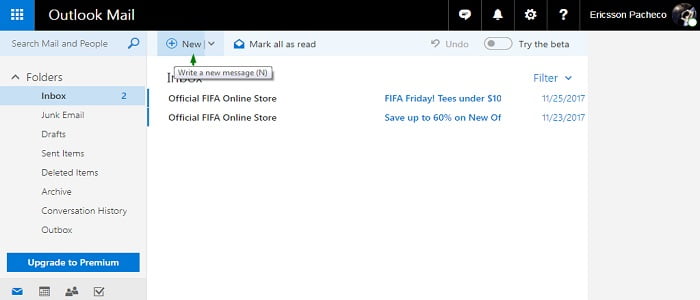
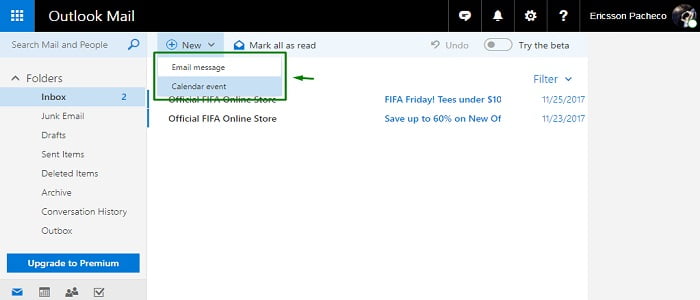
To compose an email, you are going to click on the “New” button that is the top left of the inbox. If you click on the button right away the email writing page will be opened, but if you click on the arrow next to the button, you can choose from “Email message” to create an email or “Calendar event” to save some things to do in the future on the calendar.
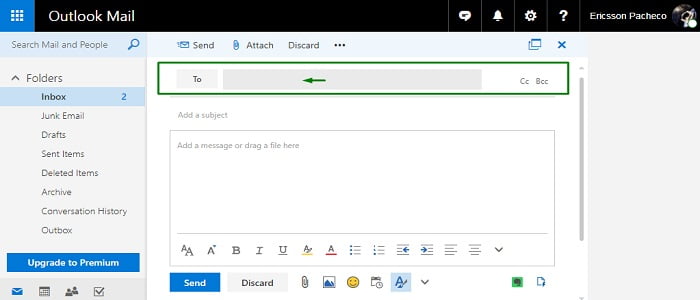
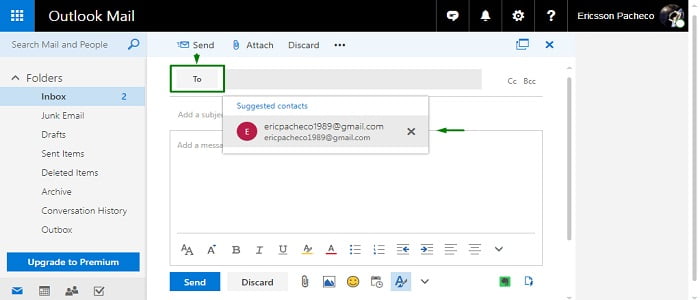
By clicking on “New” you will be in no time on the writing page to compose your new email. First, you should add a contact as a receipt who is the person receiving the message, which you can do it manually by writing the email address on the bar next to the “To” button, or you can choose the receipt from your contacts by clicking directly on “To” and then select the contact from your list.
Remember, you can add as many receipts as you want using your contact list, as well as writing them down directly on the empty bar, but do not forget to separate every email address with a comma.
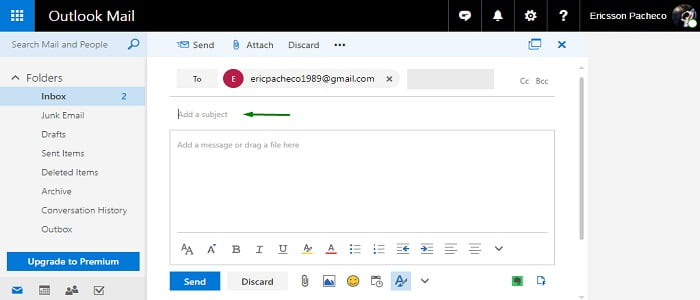
Now that you have your receipt, the next thing to do is to add a subject on the corresponding empty bar underneath the receipt space, and like this you can tell who is receiving the email what the message is about, and therefore if it needs urgent attention or not. In this case is better to write a short and precise description.
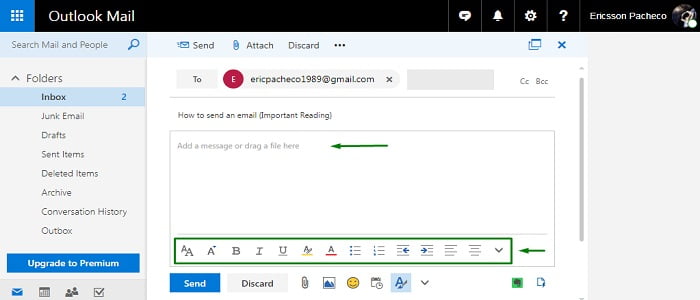
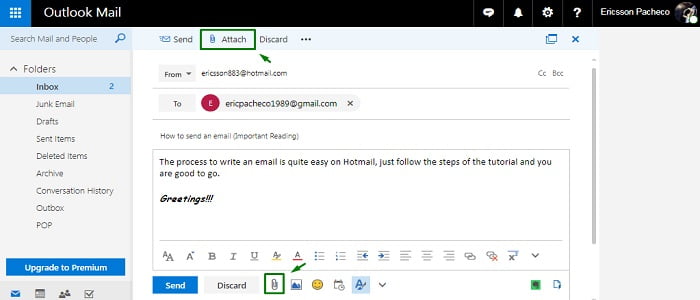
Having the receipt and proper subject of our message, now we can start adding some content by writing it, telling the receipt about the reason and purpose of the email, which could be anyone from business to family related. To write the message, click on the blue square below the subject.
If you want, you can edit what you are writing and use different options to modify it, like adding italic, bold and underline effects, as well as decrease and increase font size and indent, among so more. These options to modify the text you are writing are located at the blue square on the writing space.
Also, you can use other options and characteristics on your new message by adding emoji expressions, inserting images inline the text, setting sharing availability, formatting options and even saving your new email on the Evernote platform. You can do all of this by choosing the options previously explained on the action panel right below the writing space.
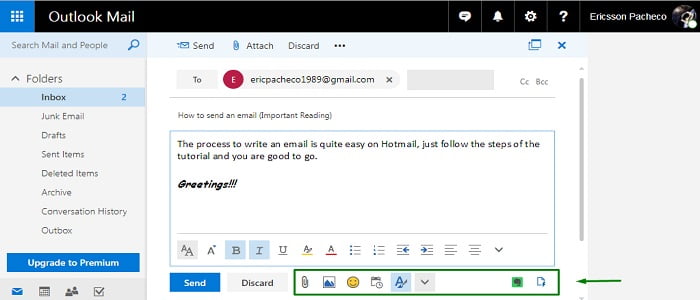
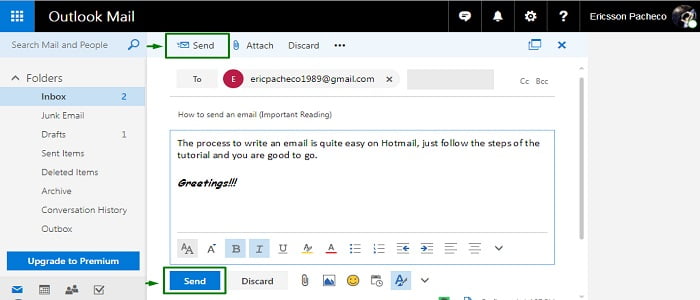
If you consider your email is ready and you want to send it, just click on the “Send” button having to options to do; by click on the one at the left of the action panel below the writing space, or the one on the left at the top of the writing space, both buttons do the same function. In this way, your message will be sent to all the receipts included.
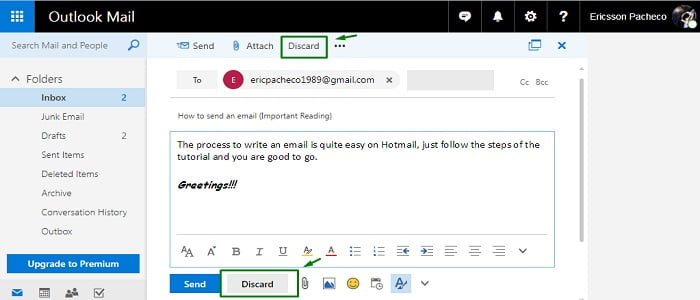
In case you do not want to send the email just yet but at some point in the future, click on the three dot icon at the right on the action panel below the writing screen, a menu will be expanded and you are going to choose the “Save draft option”. If you just want to erase the email you have created for some reason, just click on “Discard” at the top or bottom on the action panels.

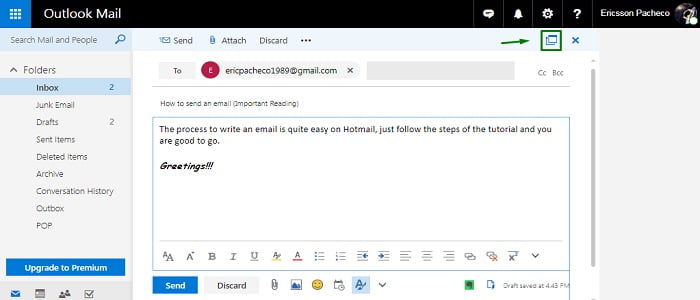
In the case you need to check out your inbox or any other folder on your Outlook email platform, but you still have to create and send a message on the go, there no problem with that; you can still writing your message by clicking on the “Edit in a separate window” button, located at the very right of the action panel above the writing screen.
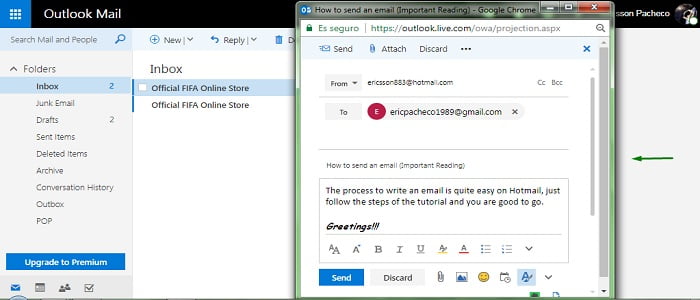
Like this, you can start writing a new email or still editing one on the go, and be able to check and interact with your Hotmail platform at the same time.
Sending photos, videos or files with Outlook Mail
Now that you know how to write an email and send it as many people as you like, it is time to follow the process of attaching files to it, in order to share photos, videos, documents and others, giving more value to emailing and an imperative function these days, since there are plenty of files that has to be sent regarding work, studies, and also the interest of sharing and hosting photos.
So, to attach a file to the email you are writing the only thing you have to do is clicking on the attachment buttons, both having the clipboard icon and being located on the action panels below and above the writing screen, right next to the “Discard” button.
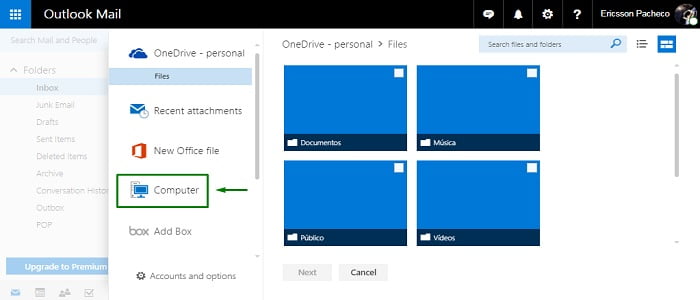
When you click on the “Attach” button a new panel will be opened, offering you different options to choose from. For example, at the left of the new panel you can pick attaching files from “OneDrive”; your personal cloud provided by Microsoft with your outlook account, you can also attach “Recent files” through the second option.
You can create new documents by using the “New Office Files” and attach them to your email, or just simply pick an already created file on your computer by using the “Computer” option. Also, if you have use the hosting platform Box to save information on the cloud, you can use the option “Box” as well.

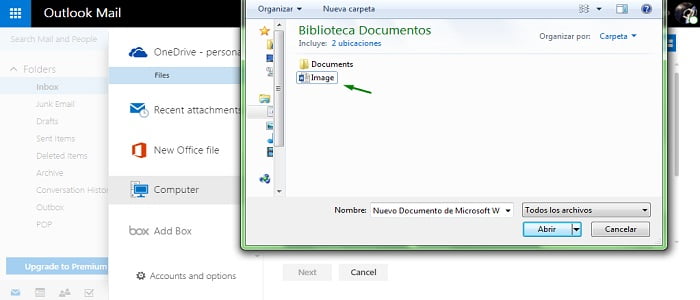
In this case we will be using the “Computer” option to attach a file that was previously saved. In so, when you click on it a new window is going to appear where you can select the folder and the specific item you want to attach to the email, so select it and double click on it.
After you follow this process, the outlook mail platform is going to ask you if you want to attach the selected file as a copy, or uploading it to OneDrive and share it on the cloud using a link. You can choose either one or the other, although the second one has the advantage to save the chosen item into your OneDrive platform, being uploaded to cloud and secure from hardware damage.
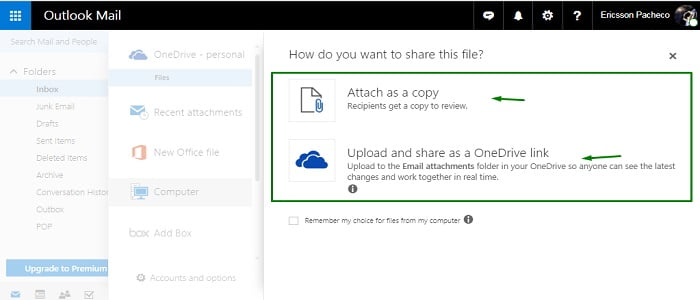
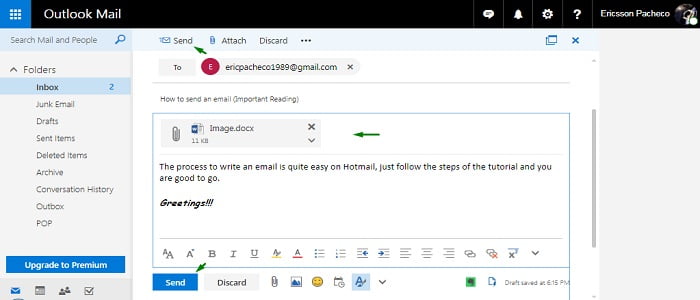
In this case we are going to choose the first option as example, so the file starts getting uploaded to the platform and after a few seconds is attached to the email and ready to send.
As you can see, the file is attached and if you consider the email is ready just click on any of the “Send” buttons at the action panels below and above the writing screen that will be it, being quite easy to send emails with files included to share all kinds of documents and multimedia files like photos, videos and so much more.
- Pingback: Outlook Mail folders and their functions
- Pingback: Outlook Mail contacts add and delete
3 Comment
Related posts